Dometic Penguin II Manual: A Comprehensive Guide
This manual details the Dometic Penguin II, a low-profile 13.5K AC unit, covering installation, operation, maintenance, and troubleshooting for optimal performance.
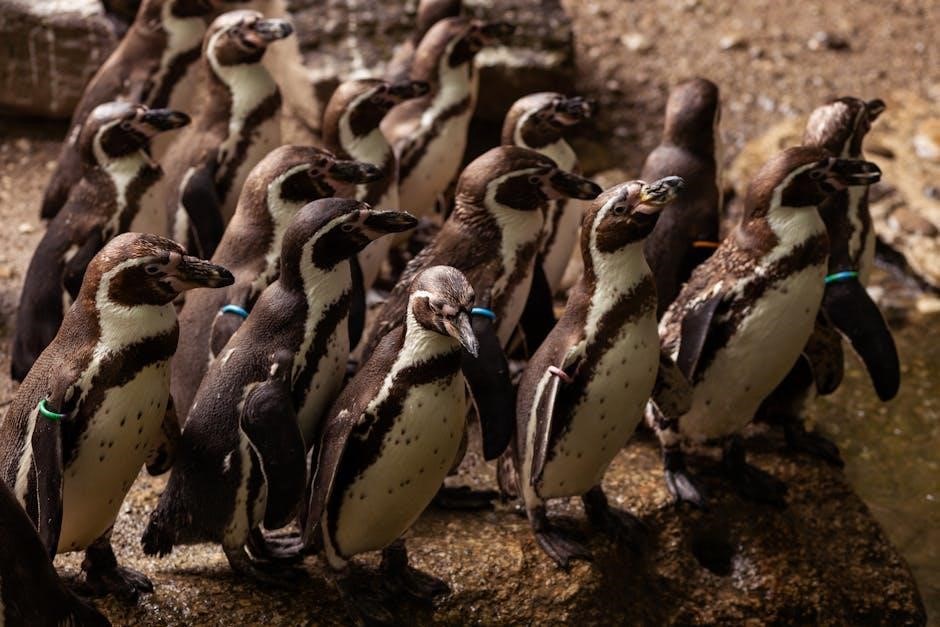
The Dometic Penguin II represents a significant advancement in RV air conditioning technology, offering a sleek, low-profile design without compromising cooling power. This unit, specifically the 951-9105304179 model, is renowned for its efficient performance and quiet operation, making it a popular choice for recreational vehicle owners seeking comfort on the road.
Its futuristic aesthetic seamlessly integrates with most RV roofs, enhancing the overall appearance. The Penguin II isn’t just about looks; it’s engineered for durability and reliability, as evidenced by instances where multiple units have been replaced due to malfunction, highlighting the need for a comprehensive understanding of its operation and maintenance. This manual serves as your guide to maximizing the lifespan and efficiency of your Dometic Penguin II air conditioner, ensuring years of comfortable travels.
Model Numbers and Variations
The Dometic Penguin II series encompasses several model numbers, each potentially offering slight variations in features or specifications. Commonly referenced numbers include 641815, 641816, 641835, and 641915, indicating different configurations tailored to specific RV needs. Understanding these distinctions is crucial for ensuring compatibility with your existing system and sourcing the correct replacement parts.
While the core functionality remains consistent – providing efficient and quiet cooling – variations may exist in BTU output, fan speeds, or control panel interfaces. It’s important to consult the specific model number listed on your unit’s data plate when ordering replacement filters or seeking technical support. The Dometic Duo-Therm Penguin II is a frequently encountered variation, and recognizing these nuances will streamline maintenance and troubleshooting efforts, ultimately maximizing the performance and longevity of your air conditioning system.
Safety Precautions
Prior to installing or servicing your Dometic Penguin II, always disconnect the power supply to prevent electrical shock. Working with electrical components requires extreme caution; improper handling can lead to serious injury or damage to the unit. Ensure the RV is parked on a level surface and properly supported before accessing the roof-mounted AC unit.
Never operate the Penguin II with damaged wiring or components. Regularly inspect the unit for signs of wear and tear, and promptly address any issues. Avoid exposing the unit to excessive moisture or harsh chemicals. When cleaning, use a mild detergent and soft cloth. Always adhere to local electrical codes and regulations during installation. Failure to follow these safety precautions could void the warranty and compromise the safe operation of your Dometic Penguin II air conditioner.
Installation Guide
Proper installation of the Dometic Penguin II involves secure mounting, correct wiring, and thorough testing to ensure efficient cooling and reliable operation.
Mounting the Penguin II
Securely mounting the Dometic Penguin II is crucial for its performance and longevity. Begin by selecting a structurally sound roof location, ensuring adequate clearance around the unit for airflow. Carefully follow the provided template for accurate hole dimensions.
Utilize the appropriate sealant, specifically designed for RV roofs, to create a watertight seal between the unit’s base and the roof surface. Ensure all mounting screws are properly tightened, but avoid over-tightening, which could damage the roof or the unit itself.
Double-check the unit’s levelness to promote proper condensation drainage. Improper leveling can lead to water accumulation and potential leaks. Finally, inspect the surrounding roof area for any obstructions that might interfere with the unit’s operation or airflow.
Wiring and Electrical Connections
Proper wiring and electrical connections are paramount for safe and efficient operation of the Dometic Penguin II. Before commencing, disconnect the power supply to prevent electrical shock. Identify the correct wiring configuration – typically 120V AC – and ensure compatibility with your RV’s electrical system.
Use appropriately sized wiring, adhering to all relevant electrical codes. Securely connect the wires using approved connectors, ensuring a tight and reliable connection. Grounding the unit is essential for safety; verify a solid ground connection to the RV’s chassis.
Double-check all connections before restoring power. Incorrect wiring can lead to damage to the unit or create a fire hazard. Consider professional assistance if you are uncomfortable with electrical work.
Initial Startup and Testing
After completing the installation and verifying all wiring connections, proceed with the initial startup and testing of your Dometic Penguin II. Restore power to the unit and observe the control panel for illumination, indicating it’s receiving power. Select a cooling mode and a moderate temperature setting to initiate the cooling process.
Listen for the fan to engage and the compressor to start. Check for proper airflow from the vents, confirming the unit is circulating air. Monitor the temperature reduction over time to ensure the cooling function is operating effectively.
Inspect for any unusual noises or vibrations that might indicate a problem. If issues arise, immediately disconnect power and review the installation steps or consult the troubleshooting section.
Operating Instructions
The Dometic Penguin II offers intuitive control via its panel, enabling cooling, fan-only modes, and precise temperature adjustments for personalized comfort and efficient operation.
Control Panel Overview
The Dometic Penguin II’s control panel is designed for user-friendly operation, providing easy access to all essential functions. Typically, the panel features clearly labeled buttons for power, mode selection (cool, fan only, auto), and temperature adjustment.
Digital displays indicate the set temperature and the current operating mode. Some models may include additional features like sleep mode or economy settings. Understanding the panel’s layout is crucial for maximizing the unit’s performance.
The ‘Fan’ button controls fan speed, offering options like low, medium, and high. The ‘Temp Up’ and ‘Temp Down’ buttons allow precise temperature adjustments. A ‘Mode’ button cycles through the available operating modes. Familiarize yourself with these controls to ensure comfortable and efficient cooling.
Cooling Mode Operation
To activate cooling mode on your Dometic Penguin II, ensure the unit is powered on and select the ‘Cool’ mode using the control panel. Once selected, set your desired temperature using the ‘Temp Up’ and ‘Temp Down’ buttons. The unit will then begin to cool the air, automatically adjusting fan speed to maintain the set temperature.
For optimal cooling, close all windows and vents. The Penguin II is designed to efficiently remove heat and humidity, providing a comfortable environment. Monitor the unit’s performance and adjust the temperature as needed.
The cooling mode utilizes a compressor and refrigerant to lower the air temperature. Regular filter cleaning is essential for maintaining cooling efficiency. Avoid obstructing the unit’s airflow for best results.
Fan-Only Mode Operation
The Dometic Penguin II’s fan-only mode provides air circulation without activating the cooling compressor. To engage this mode, press the ‘Fan’ button on the control panel. This is ideal for gently distributing air or exhausting stale air from the RV without lowering the temperature.
You can select from multiple fan speeds – Low, Medium, and High – using the corresponding buttons on the control panel. This allows you to customize the airflow to your preference. Fan-only mode consumes less power than cooling mode, making it a more energy-efficient option.
Regularly cleaning the fan blades ensures optimal airflow and prevents dust buildup. This mode is particularly useful in mild weather or when simply needing air movement.
Temperature Adjustment
The Dometic Penguin II allows precise temperature control via the control panel. Use the ‘Temp Up’ and ‘Temp Down’ buttons to adjust the desired temperature. The control panel displays the set temperature, typically ranging from 60°F to 85°F (15°C to 29°C).
The unit will automatically cycle on and off to maintain the set temperature. For optimal comfort and energy efficiency, avoid setting the temperature excessively low. A moderate temperature difference between the inside and outside of your RV is recommended.
The Penguin II features digital temperature display for accurate readings. Remember that actual perceived temperature can be affected by humidity and other factors.

Maintenance and Troubleshooting
Regular filter cleaning, coil maintenance, and addressing common issues will ensure the longevity and efficient operation of your Dometic Penguin II AC unit.
Filter Cleaning and Replacement
Maintaining a clean air filter is crucial for optimal performance and efficiency of your Dometic Penguin II. A dirty filter restricts airflow, reducing cooling capacity and potentially causing the unit to work harder, leading to increased energy consumption and possible component failure.
The filter should be inspected monthly, or more frequently if used in dusty environments. To clean the filter, simply remove it from the unit – typically located behind the intake grille. Wash the filter with mild soap and water, ensuring it is thoroughly rinsed and completely dry before reinstalling.
Replacement filters are readily available (see ‘Parts and Accessories’). Consider having a spare filter on hand to swap out during cleaning, ensuring uninterrupted cooling. A clogged or damaged filter should always be replaced rather than attempting to clean it. Proper filter maintenance significantly extends the life of your Penguin II.
Coil Cleaning
Regular cleaning of both the evaporator and condenser coils is essential for maintaining the cooling efficiency of your Dometic Penguin II. Over time, dust and debris accumulate on the coils, acting as an insulator and hindering heat transfer. This results in reduced cooling performance and increased energy usage.
Before cleaning, disconnect power to the unit. Use a soft brush attachment on a vacuum cleaner to gently remove loose dirt and debris from the coils. For stubborn buildup, a commercially available coil cleaner specifically designed for HVAC systems can be used, following the manufacturer’s instructions carefully.
Avoid bending the delicate fins on the coils. Thoroughly rinse the coils with water after cleaning, ensuring all cleaner residue is removed. Allow the coils to dry completely before restoring power to the unit. Consistent coil cleaning optimizes performance and prolongs the lifespan of your Penguin II.
Common Issues and Solutions
Several common issues can arise with the Dometic Penguin II. Reduced cooling often stems from dirty air filters or coils – cleaning or replacing these is the first step. If the unit isn’t starting, check the power supply, circuit breaker, and wiring connections. A faulty capacitor is another frequent cause of startup failures, requiring professional replacement.
Unusual noises might indicate a loose fan blade or debris within the unit; inspect and remove any obstructions. Water leaks can signal a clogged condensate drain line – clear it with a wet/dry vacuum. Multiple replacements suggest a potential electrical issue or underlying system problem.
Consult the error code section for specific diagnostics. If problems persist, contact a qualified RV technician for assistance.
Error Codes and Meanings
The Dometic Penguin II utilizes error codes to diagnose internal issues. While specific codes vary by model, common indicators include E1, signaling a temperature sensor fault, requiring sensor replacement. E2 often points to a compressor overload, potentially due to restricted airflow or a failing compressor – check filters and airflow first.
E3 typically indicates a fan motor malfunction, necessitating motor inspection or replacement. An E4 code suggests a communication error between the control panel and the unit, check wiring connections.
Consult your specific model’s documentation for a complete list of error codes and their corresponding solutions. Ignoring error codes can lead to further damage. If an unfamiliar code appears, or troubleshooting fails, contact a qualified technician for professional diagnosis and repair.
Technical Specifications
The Dometic Penguin II boasts a 13.5K BTU cooling capacity, operates on standard RV power, and features compact dimensions for easy rooftop mounting.
Dimensions and Weight
Understanding the physical characteristics of the Dometic Penguin II is crucial for proper installation and ensuring compatibility with your RV roof. The unit is designed with a low profile to minimize drag and maximize headroom inside your recreational vehicle. Typical dimensions vary slightly depending on the specific model, but generally, the Penguin II measures approximately 9.88 inches in height.
The width is around 24.5 inches, and the depth extends to about 28.5 inches. These measurements are essential for verifying clearance around roof vents and other obstructions.
Regarding weight, the Dometic Penguin II typically weighs between 80 to 90 pounds. This weight is a significant factor when considering roof load capacity and the need for appropriate mounting hardware. Always consult your RV’s manufacturer specifications to confirm the roof’s weight limit before installing any rooftop air conditioning unit.
Power Consumption
Efficient power management is vital when using the Dometic Penguin II air conditioner, especially in RVs with limited electrical capacity. This unit, typically a 13.5K BTU model, generally requires between 1500 to 1700 watts during operation. Startup current, however, can be significantly higher, often peaking around 2500-3000 watts for a brief period.
Understanding these power demands is crucial for selecting the appropriate generator or ensuring your RV’s electrical system can handle the load.
The Penguin II is designed to operate on 110/120V AC power.
Consider using a soft starter to reduce inrush current and prevent tripping breakers. Monitoring power consumption with a dedicated meter can help optimize usage and avoid overloading your electrical system, extending the life of both the AC unit and your RV’s electrical components.
Cooling Capacity (BTU)
The Dometic Penguin II is commonly available with a cooling capacity of 13,500 BTU (British Thermal Units). This rating indicates the amount of heat the air conditioner can remove from a space per hour. A 13,500 BTU unit is generally suitable for cooling RVs ranging from 300 to 500 square feet, depending on insulation, window size, and climate conditions.
However, optimal performance relies on proper sizing.
Undersized units will struggle to maintain a comfortable temperature, while oversized units may cycle on and off frequently, reducing efficiency.
Factors like direct sunlight exposure and the number of occupants also influence cooling needs. Selecting the correct BTU rating ensures efficient and effective climate control within your RV, maximizing comfort and minimizing energy consumption.
Parts and Accessories
Genuine Dometic replacement parts, including filters, control panels, and wiring diagrams, are essential for maintaining your Penguin II’s performance and longevity.
Replacement Filters
Maintaining optimal airflow is crucial for the efficiency and lifespan of your Dometic Penguin II air conditioner. Regularly replacing the air filters prevents dust and debris from accumulating on the cooling coils, which can significantly reduce cooling capacity and increase energy consumption.
Dometic recommends checking the filters monthly during periods of heavy use and replacing them at least every three months, or more frequently if you operate the unit in dusty environments. Clean filters ensure consistent airflow and contribute to better indoor air quality.
Replacement filters are readily available through Dometic authorized dealers and online retailers. Be sure to use filters specifically designed for the Penguin II model to guarantee a proper fit and optimal performance. Incorrectly sized filters can bypass the filtration system, allowing contaminants to circulate.
Control Panel Replacements
If your Dometic Penguin II’s control panel becomes damaged, unresponsive, or exhibits malfunctioning buttons, a replacement is necessary to restore full operational control of the unit. A faulty control panel can prevent you from adjusting temperature settings, fan speeds, or activating different operating modes.
Dometic offers replacement control panels specifically designed for various Penguin II models. When ordering a replacement, it’s crucial to verify compatibility with your unit’s model number to ensure a proper fit and functionality.
Replacement typically involves disconnecting the old control panel’s wiring harness and connecting it to the new panel. It’s recommended to consult the wiring diagrams in this manual or seek assistance from a qualified RV technician if you are uncomfortable with electrical connections.
Wiring Diagrams
Accurate wiring is paramount for the safe and efficient operation of your Dometic Penguin II air conditioner. These diagrams illustrate the correct connections for power supply, thermostat integration, and control panel interfacing. Incorrect wiring can lead to unit malfunction, electrical hazards, or even fire.
Diagrams detail color-coded wire connections, specifying which wires connect to the power source (typically 120V AC), the thermostat (for temperature control), and the control panel (for user input).
Always disconnect the power supply before attempting any wiring work. If you are unfamiliar with electrical wiring, consult a qualified RV technician. Improper connections can void your warranty and create dangerous situations.

Warranty Information
Dometic Penguin II units are covered by a limited warranty against defects in materials and workmanship, ensuring customer satisfaction and product reliability.
Warranty Coverage
The Dometic Penguin II warranty provides coverage for a period of one year from the original date of purchase, protecting against manufacturing defects in materials and workmanship. This warranty extends to the original purchaser and is non-transferable. Specifically, it covers components that fail due to faulty construction or assembly during normal use.
However, the warranty does not cover damage resulting from misuse, abuse, improper installation, neglect, accidents, or unauthorized modifications. Damage caused by external factors like power surges, acts of nature, or improper maintenance are also excluded. Furthermore, consequential damages, such as loss of use or inconvenience, are not covered under this warranty.
To qualify for warranty service, proof of purchase is required. Dometic reserves the right to inspect any returned product to determine the validity of the claim.
Claim Procedures
To initiate a warranty claim for your Dometic Penguin II, begin by contacting Dometic customer service or an authorized Dometic service center. You will need to provide proof of purchase, including the date and location of the original purchase, along with a detailed description of the issue. A serial number from the unit will also be required for verification.
Dometic may request photographs or videos documenting the defect to aid in the assessment. If the issue cannot be resolved remotely, you may be instructed to ship the defective component or the entire unit to a designated repair facility.
All shipping costs for returning the product are the responsibility of the claimant, unless otherwise specified by Dometic. Upon receipt and inspection, Dometic will determine whether to repair, replace, or refund the purchase price.
Frequently Asked Questions (FAQ)
Common concerns regarding the Dometic Penguin II include noise levels, energy efficiency, and replacement parts availability; find answers within this comprehensive guide.
Noise Levels
Understanding the operational sound of your Dometic Penguin II is crucial for a comfortable experience. While designed for quiet operation, several factors can influence perceived noise levels. These include the unit’s mounting quality – ensuring a secure and vibration-dampened installation is paramount.
Additionally, airflow restrictions, such as dirty filters or blocked vents, can cause the fan to work harder, increasing noise. The unit’s age and maintenance history also play a role; regular cleaning and upkeep contribute to quieter performance. Some users have reported needing triple replacements due to malfunctions, potentially indicating variations in unit quality.
Generally, the Penguin II aims for low noise output, especially with its innovative three-phase motor designs, but external conditions and proper maintenance significantly impact the actual sound level experienced within the RV or vehicle.
Energy Efficiency
Maximizing energy efficiency with your Dometic Penguin II is key to comfortable and cost-effective cooling. The 13.5K BTU unit balances cooling power with reasonable energy consumption, but several factors influence its performance. Proper insulation within your RV or vehicle significantly reduces the load on the AC, minimizing energy use.
Regular filter cleaning is essential; a clogged filter forces the unit to work harder, increasing power draw. Utilizing the fan-only mode when cooling isn’t needed conserves energy. Consider supplementing with reflective window coverings to reduce solar heat gain.
While specific power consumption figures are detailed in the technical specifications, remember that usage patterns and ambient temperature greatly affect overall energy efficiency. Newer, innovative three-phase motor designs aim to improve efficiency, but consistent maintenance remains vital.