Mini Sewing Machine Manual PDF: A Comprehensive Guide
Discover essential guidance for your compact sewing companion! This detailed PDF manual from John Lewis unlocks setup, safety, and maintenance secrets for confident use․
Understanding Your Mini Sewing Machine
Embarking on your sewing journey with a mini machine requires familiarization with its unique capabilities․ These compact devices, often detailed in a Mini Sewing Machine Manual PDF, offer portability and convenience for quick fixes and small projects․ Understanding the core functions, as outlined in resources like the John Lewis manual, is paramount․
Mini sewing machines aren’t simply scaled-down versions of standard models; they possess specific features tailored for efficiency in limited spaces; The manual will illuminate these distinctions, explaining how to leverage the machine’s strengths for optimal results․ Before operation, carefully review the manual’s introductory sections to grasp the machine’s intended use and limitations․ This foundational knowledge will prevent frustration and ensure a successful sewing experience, paving your path to success․
Key Features and Components
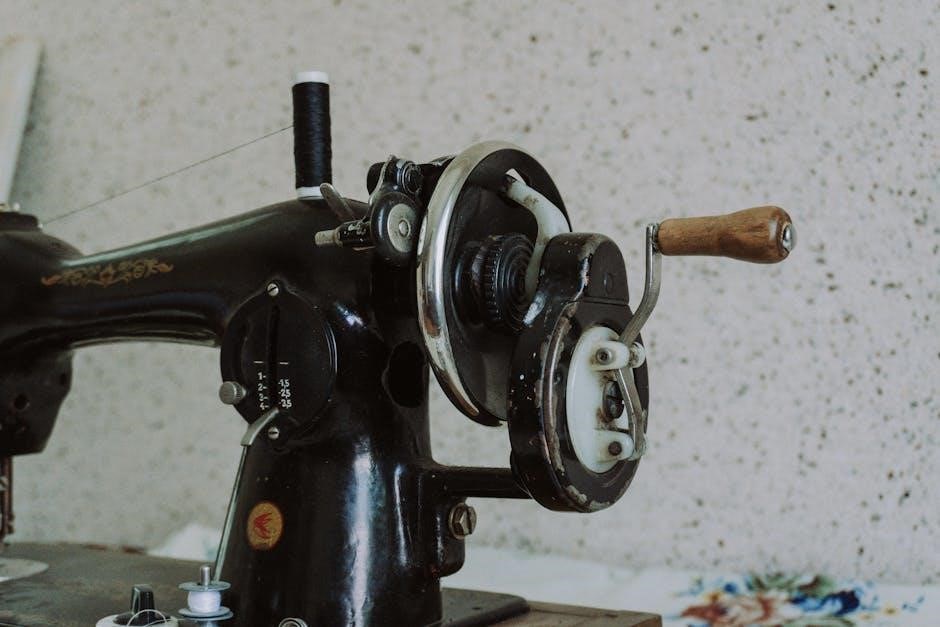
Mini sewing machines, comprehensively detailed within a Mini Sewing Machine Manual PDF, boast a surprising array of features packed into a small frame․ Core components typically include a power switch, speed control, hand wheel, needle clamp, presser foot, and bobbin winder․ The John Lewis manual emphasizes identifying each part for efficient operation and maintenance․
Key features often encompass adjustable stitch lengths and widths, multiple stitch patterns (straight, zigzag), and sometimes even reverse stitching capabilities․ Understanding the function of each component, as illustrated in the manual, is crucial․ Familiarize yourself with the bobbin case, thread tension dial, and presser foot lever․ These elements work in harmony to create consistent, professional-looking stitches, unlocking the machine’s full potential for your creative projects․
Safety Precautions
Prioritizing safety is paramount when operating a mini sewing machine, as highlighted in any comprehensive Mini Sewing Machine Manual PDF․ The John Lewis manual specifically addresses precautions, particularly concerning children․ Always supervise children and ensure they understand the machine’s potential hazards – moving parts and sharp needles pose risks․
Never attempt to repair the machine yourself while it’s plugged in․ Disconnect the power supply before changing the needle, threading, or performing any maintenance․ Keep fingers away from the needle area during operation․ Avoid using the machine if the power cord is damaged․ Proper grounding is essential to prevent electric shock․ Store the machine in a safe, dry location, out of reach of children, when not in use, following all guidelines in the manual․
Setting Up Your Machine
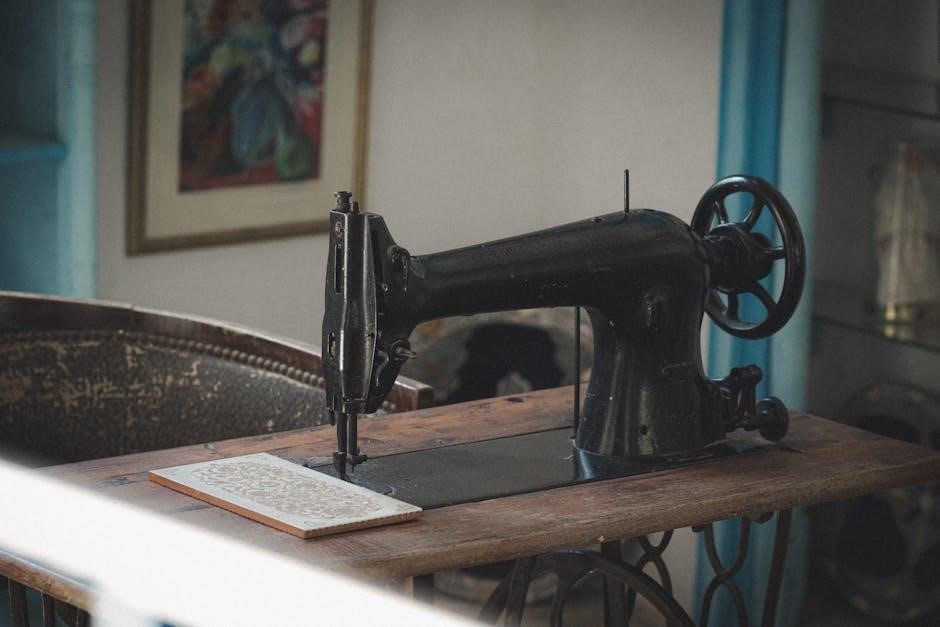
Successfully setting up your mini sewing machine, as detailed in the Mini Sewing Machine Manual PDF, is crucial for optimal performance․ The John Lewis manual guides you through initial preparation, emphasizing a stable and level work surface․ Ensure adequate lighting to clearly see the machine’s components and your fabric․
Before beginning, familiarize yourself with the machine’s parts – the power switch, handwheel, stitch selector, and bobbin winder․ The manual will illustrate these clearly․ Proper placement of the machine is key; avoid edges where it could fall․ Following the manual’s instructions for connecting the power cord and foot pedal will ensure safe and efficient operation․ Carefully review the threading and bobbin winding sections before starting to sew․
Threading the Machine
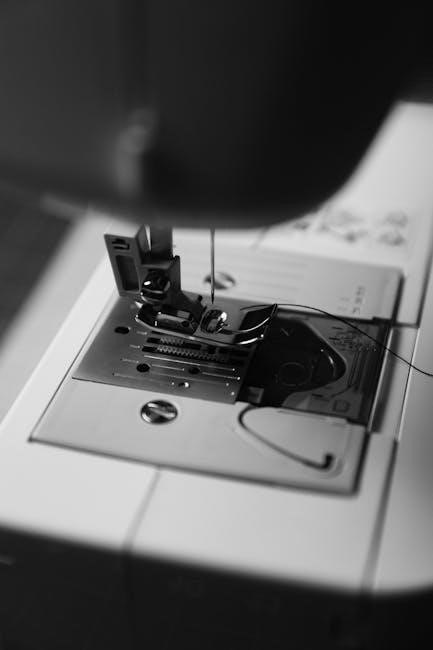
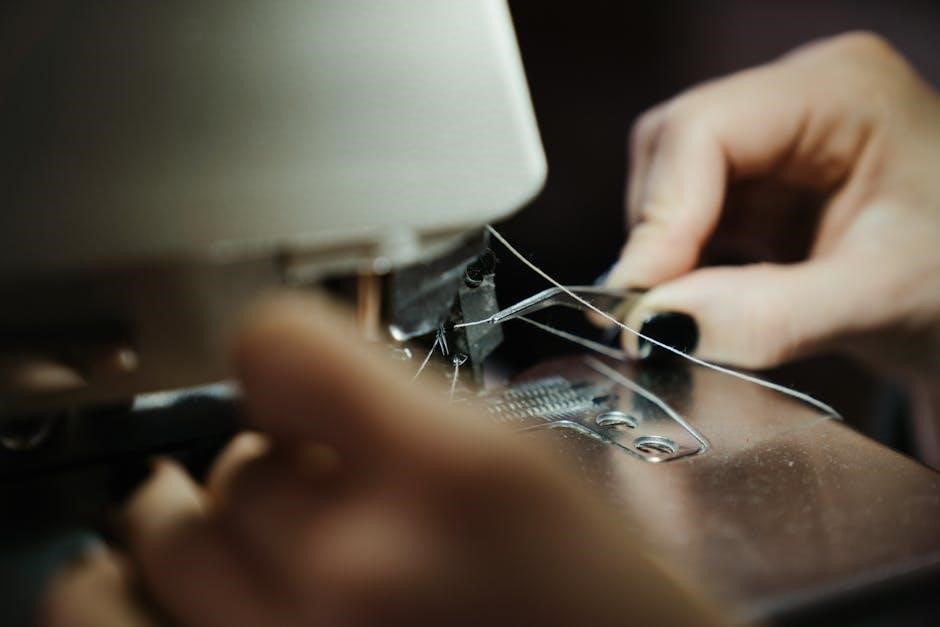
Accurate threading, as illustrated in your Mini Sewing Machine Manual PDF, is fundamental to successful sewing․ The John Lewis manual provides a step-by-step visual guide, beginning with the spool pin and guiding the thread through the tension discs․ Ensure the thread is securely seated in each guide to prevent skipping stitches․
Next, the manual details how to lead the thread through the take-up lever and finally, through the needle eye․ Using the correct needle threading technique – typically from front to back – is vital․ Always raise the presser foot before threading; this opens the tension discs․ Double-check that the thread is properly engaged in the needle’s eye before lowering the foot and beginning to sew․ Refer to the manual’s diagrams for clarity․
Winding the Bobbin
Proper bobbin winding, detailed within your Mini Sewing Machine Manual PDF, ensures consistent stitch quality․ The John Lewis manual illustrates placing the spool on the spool pin and guiding the thread through the bobbin winding tension disc․ Next, secure the thread end through the bobbin’s core hole, and attach the bobbin to the bobbin winder spindle․

Engage the bobbin winder by pushing the spindle to the right, as shown in the manual’s diagrams․ Gently press the foot pedal to begin winding, allowing several rotations to fill the bobbin evenly․ Stop when the bobbin is full, and cut the thread․ Remember to disengage the bobbin winder before sewing․ Consistent tension during winding is key; consult the manual for adjustments if needed․

Basic Sewing Techniques
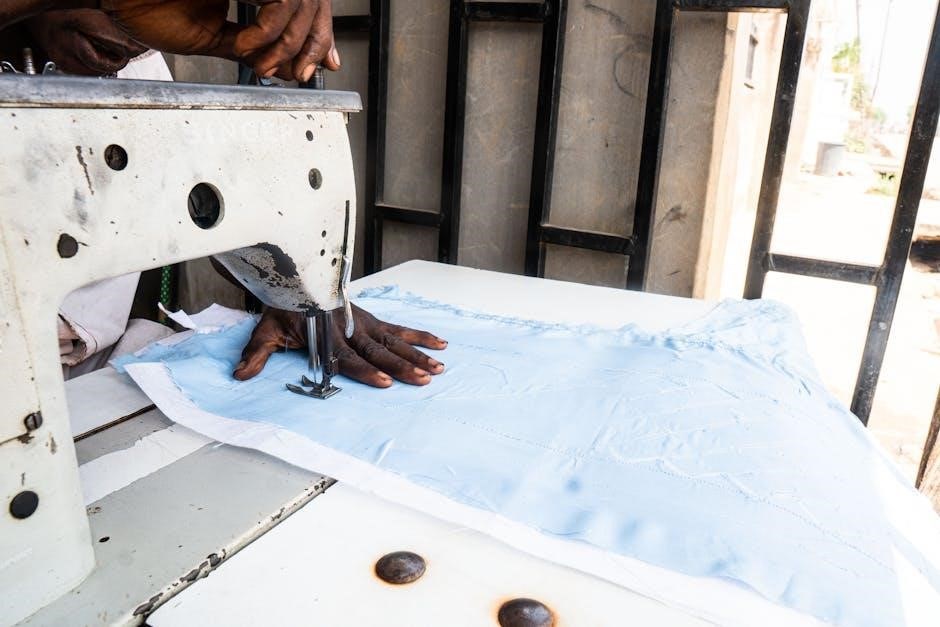
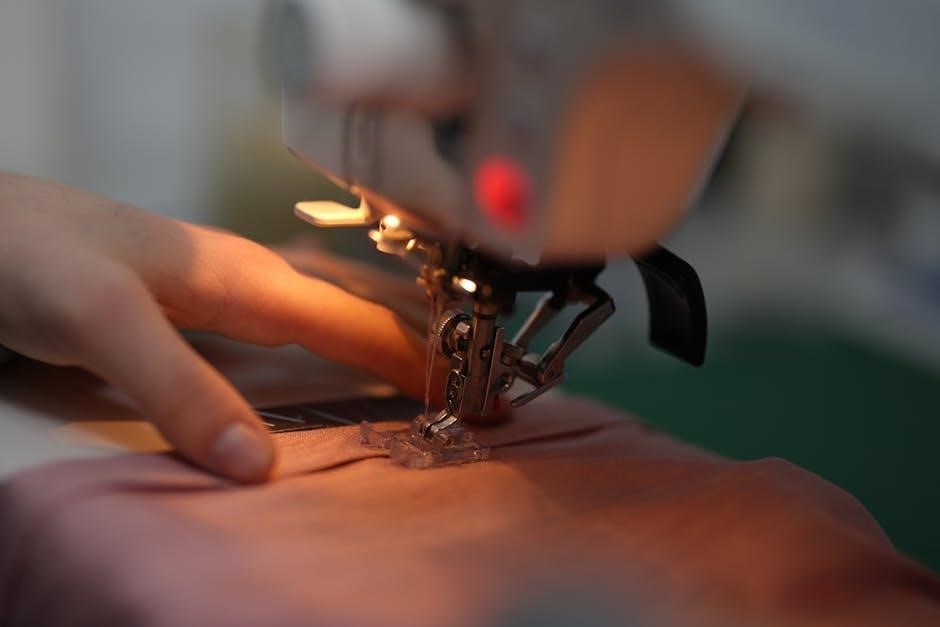
Mastering fundamental techniques, as outlined in your Mini Sewing Machine Manual PDF, unlocks creative potential․ The John Lewis manual begins with practicing on scrap fabric to familiarize yourself with the machine’s operation․ Essential skills include correctly positioning fabric under the presser foot and maintaining a consistent sewing speed․
Begin by lowering the presser foot before starting to sew, and gently guide the fabric․ Avoid pulling or pushing the fabric, allowing the machine to feed it smoothly․ Practice straight lines and curves, referencing the manual’s illustrations for guidance․ Understanding stitch formation and tension control, detailed within the PDF, is crucial for achieving professional-looking results․ Experiment with different fabric types to refine your technique․
Straight Stitching
Achieving a neat, consistent straight stitch is foundational, as detailed in your Mini Sewing Machine Manual PDF․ The John Lewis manual emphasizes selecting the appropriate needle and thread for your fabric weight․ Ensure the stitch length is set correctly – a shorter stitch for delicate fabrics, longer for heavier materials․
Begin by lowering the presser foot and gently guiding the fabric, keeping a consistent seam allowance․ Avoid pushing or pulling; let the machine feed the fabric․ Practice maintaining a straight line by using the markings on the needle plate as a guide․ Refer to the manual’s diagrams for proper fabric alignment․ Consistent pressure on the foot pedal is key for even stitching․ Regular practice builds muscle memory and improves accuracy․
Zigzag Stitching
Mastering the zigzag stitch, as explained in your Mini Sewing Machine Manual PDF, expands your project possibilities․ The John Lewis manual highlights adjusting stitch width and length for varied effects – narrow for reinforcing seams, wider for decorative applications․ Select the zigzag setting on your machine and test on scrap fabric first․
Guide the fabric slowly, allowing the zigzag foot to navigate the curves․ Use this stitch for finishing raw edges to prevent fraying, or for creating stretchable seams on knit fabrics․ Experiment with different width and length combinations to achieve desired looks․ Refer to the manual’s illustrations for proper foot positioning․ Consistent speed and gentle guidance are crucial for even zigzag lines․ Practice will refine your technique and unlock creative potential․
Adjusting Stitch Length and Width
Your Mini Sewing Machine Manual PDF details how to customize stitch parameters․ The John Lewis manual emphasizes that stitch length controls the density of stitches – shorter for fine fabrics, longer for heavier materials․ Adjust the length dial accordingly, testing on scrap fabric to ensure proper tension․
Stitch width, primarily relevant for zigzag and decorative stitches, determines the breadth of each stitch․ Wider settings create broader coverage, ideal for finishing edges or adding embellishments․ Narrower widths are suitable for reinforcing seams․ Consult the manual’s diagrams for dial locations․ Remember to re-test after each adjustment․ Incorrect settings can lead to puckering or loose stitches․ Precise control over length and width unlocks creative sewing possibilities․
Troubleshooting Common Issues
The Mini Sewing Machine Manual PDF, like the John Lewis guide, dedicates a section to resolving frequent problems․ Thread jamming is often caused by improper threading or lint buildup; re-thread carefully and clean the machine․ Needle breakage usually indicates incorrect needle size for the fabric or excessive speed․
Always use the correct needle type! Skipped stitches can stem from a dull needle, incorrect threading, or improper tension․ Refer to the manual’s diagrams for correct threading paths․ If the machine is making unusual noises, stop immediately and inspect for obstructions․ Regular maintenance, as outlined in the PDF, prevents many issues․ Don’t force anything; gentle troubleshooting is key․ Consult the manual before attempting repairs․
Thread Jamming
Thread jamming, a common issue addressed in the Mini Sewing Machine Manual PDF, often arises from incorrect threading procedures․ Carefully retrace the threading path, ensuring the thread engages all tension discs and guides correctly, as illustrated in the John Lewis manual․ Lint and debris accumulation within the machine are also frequent culprits; regular cleaning is vital․
Check the bobbin area for tangled threads․ Ensure the presser foot is raised when threading to release tension․ Using low-quality thread can contribute to jamming․ If the jam persists, gently remove the stuck thread – never pull forcefully․ Refer to the manual’s diagrams for precise threading instructions․ Proper tension settings are crucial; adjust as needed․ Prevention through regular maintenance is best!
Needle Breakage
Needle breakage, detailed in your Mini Sewing Machine Manual PDF, typically stems from several preventable causes․ Incorrect needle selection for the fabric type is a primary factor; the John Lewis manual provides a comprehensive needle guide․ Forcing the fabric through the machine, rather than letting the feed dogs do the work, puts undue stress on the needle․
Ensure the needle is correctly inserted – fully up and facing the right direction․ Bent or damaged needles must be replaced immediately․ Check for obstructions like pins or thick seams before sewing․ Improper thread tension can also contribute to breakage․ Always use a new needle for each project, or when changing fabric types․ Refer to the manual’s troubleshooting section for specific guidance․ Regular maintenance and proper technique are key!

Needle and Thread Selection
Choosing the correct needle and thread, as detailed in your Mini Sewing Machine Manual PDF, is crucial for successful sewing․ The John Lewis manual emphasizes matching needle type and size to your fabric weight․ Universal needles work for woven fabrics, while ballpoint needles are best for knits to avoid snagging․
Thread weight should complement the fabric and needle size; lighter fabrics require finer thread․ Polyester thread is a versatile all-purpose option, while cotton is ideal for natural fibers․ Always test your chosen combination on a scrap of fabric before starting your project․ Refer to the manual’s charts for specific recommendations․ Incorrect pairings can lead to skipped stitches, thread breakage, or fabric damage․ Proper selection ensures a professional finish․
Maintaining Your Mini Sewing Machine
Regular maintenance, as outlined in your Mini Sewing Machine Manual PDF, extends the life of your machine and ensures optimal performance․ The John Lewis manual stresses the importance of cleaning lint and dust from the bobbin area and feed dogs after each use․ Oiling key components, like the motor and moving parts, prevents friction and keeps everything running smoothly․
Always unplug the machine before cleaning or oiling․ Inspect the handwheel and surrounding areas for debris․ Refer to the manual’s diagrams for specific oiling points․ Neglecting maintenance can lead to malfunctions and reduced stitch quality․ Consistent care guarantees years of reliable service․ Following these simple steps, detailed in the PDF, will keep your mini sewing machine in top condition․
Cleaning and Oiling
Your Mini Sewing Machine Manual PDF emphasizes routine cleaning and oiling for longevity․ Begin by unplugging the machine – safety first! Use a soft brush to remove lint and dust from the bobbin case, feed dogs, and surrounding areas․ A small vacuum cleaner attachment can also be helpful․
For oiling, the John Lewis manual specifies using sewing machine oil, applied sparingly to the motor, handwheel, and any moving parts indicated in the diagrams․ Avoid over-oiling, as this can attract more dust․ Wipe away any excess oil with a clean cloth․ Regular cleaning prevents thread buildup, while oiling ensures smooth operation․ Consistent attention to these details, as detailed in the PDF, will maintain peak performance․
Replacing Parts
The Mini Sewing Machine Manual PDF details procedures for replacing worn or damaged components․ Always refer to the parts diagram within the manual to ensure correct identification and installation․ Common replacements include needles, presser feet, and occasionally, the bobbin case․
John Lewis manuals stress using only genuine replacement parts, available through authorized dealers or the manufacturer’s website, to maintain machine quality and warranty validity․ Before replacing any part, unplug the machine․ Follow the step-by-step instructions in the PDF carefully, noting screw locations and orientations․ Proper replacement, as illustrated, guarantees continued smooth operation and prevents further damage․ Consult the manual if unsure about any step․
Downloading a Mini Sewing Machine Manual PDF
Accessing your Mini Sewing Machine Manual PDF is straightforward! Many manufacturers, like John Lewis, offer downloadable manuals directly from their official websites․ Navigate to the support or downloads section, and search for your specific model number․ Alternatively, a general web search using “Mini Sewing Machine Manual PDF” plus your brand and model will often yield results․
Ensure the website is reputable to avoid malware․ Look for official manufacturer sites or trusted online retailers․ Downloaded PDFs should be saved to a secure location on your device for easy access․ Having a digital copy is incredibly convenient for quick reference during setup, troubleshooting, or maintenance, eliminating the need for a physical copy․
Popular Mini Sewing Machine Brands & Models (Manual Availability)
Several brands dominate the mini sewing machine market, with varying PDF manual availability․ John Lewis provides readily accessible manuals on their website for their models․ Singer, a well-known name, typically offers PDFs for download via their support pages, though navigation can sometimes be complex․ Brother also generally provides downloadable manuals, often requiring registration․
Janome, another popular choice, usually has manuals available as PDFs on their official site․ For lesser-known brands, finding a direct PDF might be harder; however, universal mini sewing machine manuals or online forums can offer assistance․ Always verify the manual matches your exact model number for accurate instructions and safety information․
Resources for Learning More
Beyond your mini sewing machine’s PDF manual, a wealth of learning resources exists․ YouTube is brimming with tutorial videos demonstrating techniques and troubleshooting common issues․ Online sewing forums, like those on Reddit (r/sewing) or dedicated crafting sites, offer community support and advice from experienced users․
Websites such as “Sewing Support” and “AllFreeSewing” provide articles, guides, and project ideas suitable for beginners․ Many retailers, including John Lewis, offer online workshops or classes․ Don’t overlook the power of visual learning – Pinterest boards dedicated to mini sewing machines can inspire projects and offer quick tips․ Remember to always cross-reference information and prioritize safety!