Denture repair kits, like Repair-It, offer a convenient, temporary fix for broken dentures, avoiding immediate dental visits. Several video tutorials demonstrate ease of use.
These kits provide a cost-effective solution for cracks or missing teeth, utilizing adhesive for quick repairs, as shown in online demonstrations from 2020-2025.
Repair-It specifically aims for fast, inexpensive repairs, completing the process in minutes, according to product information and user experiences shared online.
What are Denture Repair Kits?
Denture repair kits, such as the Repair-It kit, are designed as temporary solutions for damaged dentures, offering a quick fix before a professional dental appointment. These kits generally contain a denture adhesive, often a specialized resin, and tools to aid in application and curing.
Online resources, including video tutorials from sources like Eva Boldridge DMD PA and Dentalchick_ on TikTok, demonstrate how these kits enable users to address common issues like cracks or missing teeth. They are readily available at local drug stores, typically costing under $10, providing an accessible option for immediate repair.
However, it’s crucial to understand these are not permanent fixes; they offer a temporary restoration of function and appearance, as highlighted in demonstrations from 2020, 2021, 2022, 2024 and 2025.
When to Consider a Repair Kit vs. Professional Repair
Denture repair kits, like Repair-It, are best suited for minor, temporary fixes – a cracked base or a recently lost tooth. They offer immediate relief and functionality, as shown in numerous online tutorials. However, significant damage necessitates professional attention.
If the denture is severely fractured, warped, or exhibits persistent discomfort even after a kit repair, a dentist’s intervention is crucial. Professional repairs ensure proper fit, bite alignment, and long-term oral health. Relying solely on kits for extensive damage can lead to further complications.
Consider a kit for short-term solutions, but prioritize a dental visit for lasting and structurally sound denture maintenance, as emphasized by dental professionals in online content.
Understanding the Repair-It Denture Repair Kit
Repair-It provides a quick, inexpensive solution for broken dentures, containing adhesive and tools for immediate repair. Online videos showcase its simplicity.
The kit handles cracks and missing teeth, but has limitations; it’s a temporary fix, not a replacement for professional dental care, as demonstrated online.
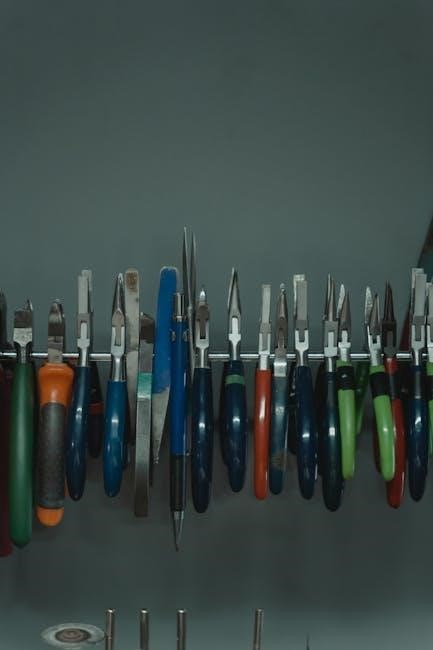
Kit Contents: A Detailed Breakdown
Repair-It denture repair kits generally include several key components designed for at-home fixes. The core element is the dental adhesive, a polymethyl methacrylate resin, crucial for bonding fractured pieces. Typically, the kit provides sufficient adhesive for one or more repairs, depending on the extent of the damage.
Alongside the adhesive, you’ll find a mixing well or tray, essential for properly combining the adhesive components. Several kits also incorporate a small brush or applicator for precise adhesive placement onto the broken denture surfaces. Furthermore, a set of abrasive pads or files is included to smooth any excess adhesive after the curing process, ensuring comfort.
Instructional materials, often in the form of a leaflet or access to online videos, guide users through each step. Some kits may also contain gloves to minimize skin contact with the adhesive, and occasionally, temporary tooth replacements for missing teeth.
Types of Breaks Repair-It Can Handle
Repair-It is primarily designed for relatively simple denture fractures. It effectively addresses clean breaks in the denture base – the pink acrylic portion – allowing for re-adhesion of separated pieces. The kit is also suitable for reattaching broken denture teeth, provided the tooth fragment is still available and the break is not overly complex;
Minor cracks in the denture base can be stabilized with the adhesive, preventing further propagation of the fracture. However, it’s important to note that Repair-It isn’t intended for extensive damage, such as multiple fractured pieces or breaks extending deeply into the denture structure.
Online videos demonstrate successful repairs of common breaks, but the kit’s effectiveness diminishes with severely damaged dentures. It’s a temporary solution, best suited for stabilizing dentures until professional repair is possible.
Limitations of the Repair-It Kit
Repair-It offers a temporary fix, and its durability is limited compared to professional denture repairs. The adhesive bond isn’t as strong as dental acrylic, meaning repairs can fail, especially with significant stress from chewing. Severely fractured dentures, or those with missing sections, are beyond the kit’s capabilities.
The kit isn’t suitable for repairing metal-based dentures or those with complex internal structures. It’s also ineffective for addressing issues like ill-fitting dentures or problems with the bite. Video tutorials emphasize this is a short-term solution.
Repeated use of Repair-It isn’t recommended, as it can compromise the denture material. Ultimately, professional repair or replacement remains the most reliable long-term option.

Step-by-Step Instructions for Denture Repair
Repair-It instructions involve cleaning, drying the denture, applying adhesive precisely, clamping for curing, and removing excess material – a quick process shown in online videos.
Preparation: Cleaning and Drying the Denture
Before initiating the Repair-It process, thorough cleaning is paramount. Remove any existing denture adhesive residue using a denture brush and appropriate cleanser; avoid abrasive materials that could scratch the surface.
Rinse the denture meticulously under warm water, ensuring all traces of cleanser are eliminated. Crucially, the denture must be completely dry before applying the adhesive. Use a clean, lint-free cloth to pat it dry, paying close attention to the fractured areas.
Any moisture present will hinder the adhesive’s bonding ability, potentially leading to a failed repair. Ensure the surfaces to be joined are not only clean but also absolutely dry for optimal adhesion, as demonstrated in various online video tutorials.
Applying the Adhesive – Correct Amount & Placement
Carefully apply the Repair-It adhesive to both surfaces of the broken denture, following the kit’s instructions precisely. Avoid excessive application; a thin, even layer is most effective. Too much adhesive can create a messy overflow and weaken the bond.
Focus the adhesive specifically on the fractured areas, ensuring complete coverage where the pieces will rejoin. Do not apply adhesive to areas that will come into contact with your gums. Precise placement is key for a comfortable and secure fit.
Refer to video tutorials for visual guidance on the correct amount and distribution. Remember, a controlled application yields the best results, maximizing the repair’s strength and longevity.
Clamping and Curing Process – Timing is Key
Immediately after applying the adhesive, firmly clamp the denture pieces together, aligning them precisely as they were originally. The Repair-It kit includes a clamping device for this purpose; ensure it’s securely fastened.
Maintain consistent pressure during the curing process, which typically lasts several minutes – refer to the kit’s specific timing guidelines. Avoid disturbing the denture during this critical phase, as movement can compromise the bond.
Video demonstrations emphasize the importance of adhering to the recommended curing time for optimal strength. Patience is crucial; allowing sufficient time ensures a durable and reliable repair.
Removing Excess Adhesive
Once the curing process is complete, carefully remove the clamping device. You’ll likely notice excess adhesive squeezed out during the clamping and curing stages – this is normal and indicates a good bond.
Using a clean, dry cloth or a cotton swab, gently wipe away the excess adhesive. Avoid using water or solvents at this stage, as they could weaken the newly formed bond. Be precise to avoid damaging the denture surface.
Tutorials highlight the importance of thorough removal for comfort and aesthetics. A sharp blade, used cautiously, can help trim stubborn remnants, ensuring a smooth and natural finish.

Addressing Specific Denture Break Types
Repair-It tackles cracked bases, broken teeth, and splits with adhesive, though success varies by break severity. Video guides demonstrate techniques for each scenario.
Proper preparation and adhesive application are crucial for effective repairs, as shown in online tutorials from 2020-2025.
Repairing a Cracked Denture Base
Repairing a cracked denture base with Repair-It requires meticulous cleaning and drying of the fractured areas. Ensure no debris interferes with the adhesive bond. Apply the adhesive directly into the crack, following the kit’s instructions for quantity – avoid over or under-application.
Video tutorials emphasize a thin, even layer for optimal strength. Clamp the denture firmly together, maintaining pressure during the curing process, typically several minutes. Excess adhesive must be carefully removed before it fully hardens, using a clean tool.
Online resources from 2020-2025 highlight that this method provides a temporary fix; a professional dental repair is recommended for long-term stability. Inspect the repaired area regularly for re-cracking.
Reattaching a Broken Denture Tooth
Repair-It can reattach a broken denture tooth, but preparation is key. Thoroughly clean both the tooth and the denture base where it was detached, removing any old adhesive. Apply a small amount of the Repair-It adhesive to the base where the tooth will be positioned.
Carefully align the tooth and press it firmly into the adhesive, holding it securely for the recommended curing time – typically a few minutes, as shown in online videos. Remove any excess adhesive immediately with a clean, soft cloth or tool.
Remember, this is a temporary solution. Regular inspection is crucial, and professional dental attention is advised for a lasting repair, according to resources from 2020-2025.
Fixing a Split Denture
Repair-It can address a split denture, but the success depends on the severity of the break; Begin by meticulously cleaning both fractured surfaces, ensuring no debris hinders adhesion. Apply a generous, yet controlled, amount of Repair-It adhesive along the entire length of the split.
Firmly press the two pieces together, clamping them if possible, and hold for the specified curing time – typically several minutes, as demonstrated in online tutorials. Remove any squeezed-out adhesive promptly with a soft cloth.
A split denture repair is often less durable; frequent monitoring is vital. Professional repair remains the recommended long-term solution, as highlighted in resources from 2020-2025.
Troubleshooting Common Issues
Repair-It failures can occur if adhesive isn’t applied correctly, or the denture isn’t properly clamped during curing, as shown in video tutorials.
Loose dentures post-repair often indicate insufficient adhesive or a compromised structural break.
Adhesive Not Holding
If the Repair-It adhesive fails to hold, several factors could be at play. Thorough cleaning and complete dryness of the denture surfaces are paramount; any residual moisture hinders bonding, as emphasized in online tutorials.
Insufficient adhesive application is a common issue. Ensure adequate coverage of the fractured areas, following the kit’s instructions precisely. Conversely, excessive adhesive can also weaken the bond, so precise placement is key.
The clamping pressure during the curing process must be firm and consistent. Inadequate pressure prevents proper adhesion. Finally, the type of break matters; Repair-It is best suited for specific fractures, and complex breaks may require professional intervention.
Review video demonstrations for correct technique.
Denture Feels Loose After Repair
A loose feeling post-repair with Repair-It often indicates insufficient adhesive penetration into the fractured surfaces. Re-evaluate the initial cleaning process; any lingering debris prevents a strong bond. Ensure the adhesive fully filled the gap before clamping.
Improper curing time is another potential cause. Adhere strictly to the kit’s recommended curing duration – too short, and the adhesive won’t fully harden. Excessive force during biting after repair can also compromise the bond.
Consider the break’s location; repairs near stress points are more prone to failure. If looseness persists, a professional dental adjustment might be necessary. Consult video tutorials for proper technique.
Repair Fails Immediately
Immediate repair failure with Repair-It usually points to inadequate preparation. Thorough cleaning and complete dryness of the denture surfaces are crucial; any moisture hinders adhesion. Insufficient adhesive application is another common culprit – ensure full coverage of the fractured areas.
Incorrect clamping pressure can also cause immediate failure. Too little pressure prevents proper bonding, while excessive force might distort the denture. Verify the adhesive hasn’t expired, as its effectiveness diminishes over time.
For complex breaks or those involving significant tooth loss, the kit may simply be unsuitable. Refer to online video guides for best practices.

Safety Precautions When Using Repair Kits
Avoid skin contact with the adhesive, ensuring proper ventilation during application. If swallowed, seek immediate medical attention, following kit instructions carefully.
Avoiding Skin Contact with Adhesive
The adhesive within Repair-It and similar denture repair kits is designed to bond strongly, and this potency necessitates careful handling. Direct skin contact should be strictly avoided, as the adhesive can cause irritation and may be difficult to remove.
Always utilize gloves – disposable latex or nitrile gloves are ideal – when applying the adhesive to your dentures. Ensure complete coverage of your hands to prevent any accidental contact. If adhesive does come into contact with skin, immediately wash the affected area with copious amounts of warm water and mild soap.
Avoid using harsh solvents or abrasive cleaners, as these can exacerbate skin irritation. If irritation persists, consult a medical professional. Prioritizing skin protection is crucial for a safe and successful denture repair experience.
Proper Ventilation During Application
Repair-It and comparable denture repair kits contain adhesives that release fumes during the curing process. Adequate ventilation is paramount to minimize inhalation of these vapors, which can cause respiratory irritation or discomfort for some individuals.
Always apply the adhesive in a well-ventilated area, such as a room with an open window or utilizing a fan to circulate air. Avoid using the kit in enclosed spaces with limited airflow. Ensure the ventilation remains consistent throughout the entire application and curing duration.
If you experience any dizziness, nausea, or headache while using the kit, immediately move to fresh air and discontinue use. Prioritizing proper ventilation safeguards your respiratory health during the denture repair process.
What to Do if Adhesive is Swallowed
Accidental ingestion of Repair-It adhesive is a serious concern requiring immediate attention. While rare, swallowing even a small amount can cause irritation or digestive upset. Do not induce vomiting unless specifically directed by a medical professional or poison control center.
Immediately rinse your mouth thoroughly with water to remove any remaining adhesive. Contact the Poison Control Center at 1-800-222-1222 for guidance, even if you feel no immediate symptoms. They can provide tailored advice based on the amount ingested.
Seek medical attention if you experience any adverse reactions, such as difficulty breathing, persistent nausea, or abdominal pain. Keep the kit packaging available to provide information to medical personnel.
Comparing Repair-It to Other Denture Repair Kits
Repair-It competes with kits like Dentemp, offering similar quick fixes. Cost-wise, DIY kits are significantly cheaper than professional dental repairs, as demonstrated online.
Dentemp vs. Repair-It: A Side-by-Side Comparison
Repair-It and Dentemp are both popular choices for at-home denture repair, offering a temporary solution to cracks and breaks. Both kits utilize a bonding agent to reattach pieces, aiming for a quick fix without a dental visit.
However, key differences exist. Repair-It is frequently highlighted for its speed and ease of use, with numerous video tutorials demonstrating its simple application process. Dentemp, while also user-friendly, may require slightly more precision.
Cost-wise, both kits are relatively inexpensive, typically under $10, making them accessible alternatives to professional repairs. Online reviews suggest Repair-It might offer a slightly stronger bond for certain types of breaks, but results can vary.
Ultimately, the best choice depends on the specific break and user preference, with both providing a temporary solution until professional care is sought.
Cost Analysis of DIY vs. Professional Repair
A significant advantage of using a denture repair kit like Repair-It is the cost savings compared to professional dental work. DIY kits typically cost under $10, offering an immediate, inexpensive solution for minor breaks or cracks.
Professional denture repairs, however, can range from $100 to $500 or more, depending on the extent of the damage and the dental practice’s fees. This cost covers the dentist’s expertise, materials, and lab work.
While Repair-It provides a temporary fix, it avoids the immediate expense of a dental visit. However, it’s crucial to remember that DIY repairs aren’t permanent and professional attention is eventually needed.
Considering long-term costs, regular professional maintenance can prevent more extensive – and expensive – damage down the line, outweighing the initial savings of a DIY kit.
Long-Term Care After Repairing Your Denture
Regular inspection for weak points and careful cleaning are vital after using Repair-It. Professional dental check-ups remain essential for lasting denture health.
Cleaning Recommendations
Following a repair with a kit like Repair-It, gentle cleaning is paramount. Avoid abrasive pastes or brushes that could compromise the newly bonded areas. Instead, utilize a soft-bristled toothbrush and a mild denture cleanser.
Daily soaking in denture cleaning solution helps remove debris and maintain hygiene. Thorough rinsing under lukewarm water after each use is also crucial. Avoid hot water, as it can warp the denture’s shape.
Pay close attention to the repaired section, ensuring no adhesive residue accumulates. Regular, careful cleaning extends the repair’s lifespan and prevents further damage. Remember, these kits offer temporary fixes, and professional cleaning remains vital.
Regular Inspection for Weak Points
Post-repair, consistent inspection is vital for longevity. Examine the repaired area daily for any signs of separation, cracking, or adhesive failure. Gently flex the denture to identify potential stress points.
Focus on areas surrounding the repair, as stress can redistribute. Look for discoloration or roughness, indicating adhesive breakdown. Early detection prevents complete failure and avoids swallowing loose parts.
Remember Repair-It provides a temporary solution; professional evaluation is crucial. If weaknesses emerge, discontinue use and consult your dentist. Proactive inspection safeguards your oral health and prevents complications arising from a compromised denture.
When to Seek Professional Help Again
Despite a successful Repair-It fix, professional dental attention is often necessary. If the repair fails repeatedly, or the denture exhibits significant structural damage, a dentist is crucial.
Persistent looseness, discomfort, or changes in bite alignment warrant immediate evaluation. Don’t ignore cracks extending beyond the repaired area, as they compromise the denture’s integrity.
Repair-It is a temporary solution; long-term denture health requires professional care. Regular dental check-ups ensure proper fit, prevent gum irritation, and address underlying issues. Prioritize professional guidance for lasting denture functionality and oral well-being.
Video Tutorials and Resources
Numerous online video tutorials, from creators like Eva Boldridge DMD PA and Dentalchick_ on TikTok, demonstrate Repair-It’s use, offering visual guidance.
Official resources, including the Dentemp website, provide support and instructions for effective denture repair using the Repair-It kit.
Links to Helpful YouTube Videos
While a direct, official Repair-It YouTube channel isn’t prominently featured, several user-generated videos offer valuable insights. Searching “denture repair kit” or “Repair-It” on YouTube reveals numerous demonstrations.
Specifically, videos from 2021 and 2022 showcase the kit’s application on partial dentures, highlighting the ease of use and quick repair times. JOs dentures lab provides a detailed overview, while other creators offer tutorials on fixing cracks and reattaching teeth.
These videos visually guide users through each step, from cleaning and preparation to adhesive application and curing. They often address common issues and provide troubleshooting tips, supplementing the kit’s instructions. Remember to evaluate the uploader’s credibility before following any advice.
Official Repair-It Website and Support
The site provides a comprehensive overview of the kit’s capabilities, limitations, and safety precautions. While direct contact options like phone support aren’t prominently displayed, a contact form allows users to submit inquiries.
Additionally, the website features links to external retailers where the kit is sold. Checking these retailers’ websites may offer further product details or customer reviews. Remember to always prioritize professional dental care when possible.
Frequently Asked Questions (FAQs)
Repair-It offers a temporary fix; repairs aren’t permanent. Most dentures are repairable, but results vary. Repairs typically last until a professional visit.
Is the Repair Permanent?
Repair-It denture repair kits, and similar products like Dentemp, are designed to provide a temporary solution for broken dentures. The adhesive used in these kits isn’t intended as a long-term fix, and the repair will likely not withstand the stresses of regular chewing over an extended period.
Online resources and user experiences consistently emphasize the temporary nature of these repairs. While effective for immediate relief and allowing continued denture use until a dental appointment, the bond created by the adhesive will eventually weaken.
Therefore, it’s crucial to schedule a visit with your dentist as soon as possible after using a repair kit. A professional repair will utilize more durable materials and techniques, ensuring a lasting and reliable restoration of your dentures’ functionality and integrity.
Can I Repair All Types of Dentures?
Repair-It and similar denture repair kits are generally suitable for repairing acrylic dentures, which are the most common type; However, they are not recommended for porcelain or metal dentures, as the adhesive won’t bond effectively to these materials.
The kits are best suited for relatively clean breaks – cracks, or for reattaching a tooth that has come loose. Severely damaged dentures, or those with complex fractures, require professional attention. Attempting a DIY repair on extensively broken dentures could worsen the damage.
Always check the kit’s packaging for specific material compatibility. If you’re unsure about your denture’s material, consult your dentist before attempting a repair to avoid potential complications.
How Long Does a Repair Last?
Repair-It and similar kits provide a temporary fix, not a permanent solution. The longevity of a repair depends heavily on factors like the type of break, proper application of the adhesive, and the user’s habits.
Generally, a repair can last from a few days to several weeks with careful use. Avoid sticky or hard foods that could dislodge the repair; Regular cleaning, as recommended, is crucial for extending the repair’s lifespan.
It’s important to remember that these kits are intended as a short-term solution until a professional repair or replacement can be arranged. Don’t delay a dentist visit expecting the repair to hold indefinitely.